- Configure source to pull data from
- Configure the embedding model
- Configure the vector storage to store to
- Run the pipeline and verify with a search
Choose your enviornment
Neum AI support the ability to create and run your RAG pipelines both locally and in our cloud enviornment. To learn more about the differences between the enviornments, see Neum AI Cloud vs Local Development- Python
- Cloud
Set up enviornment
We will start by installing the required dependencies:Install NeumAI
Configure data source
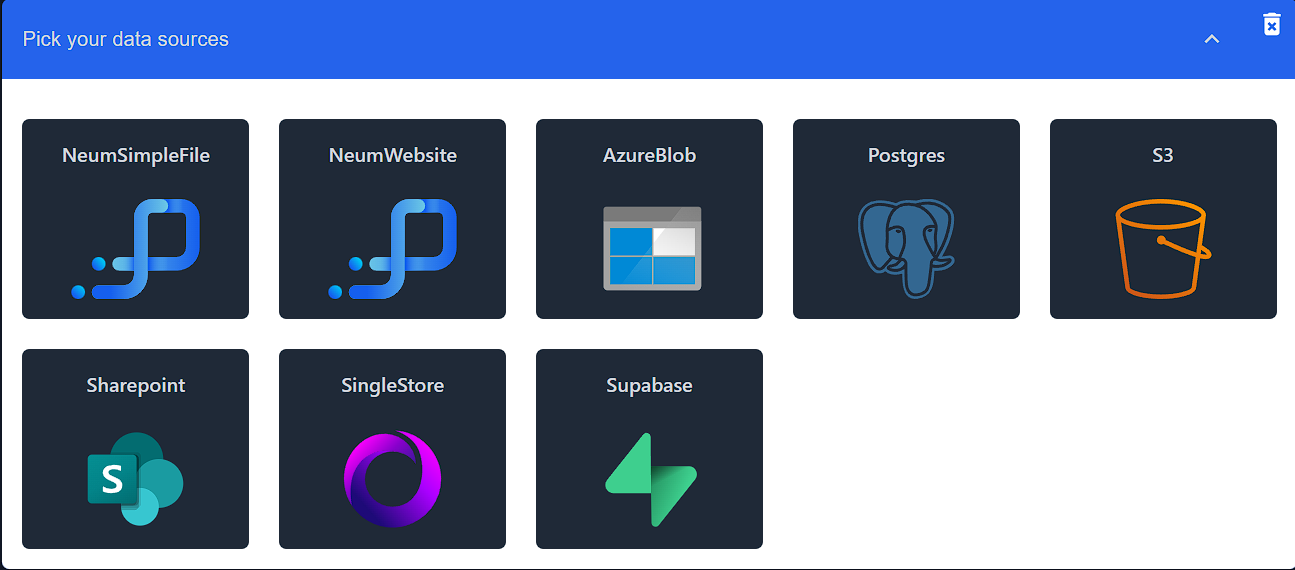
Neum AI supports a variety of data source connectors.
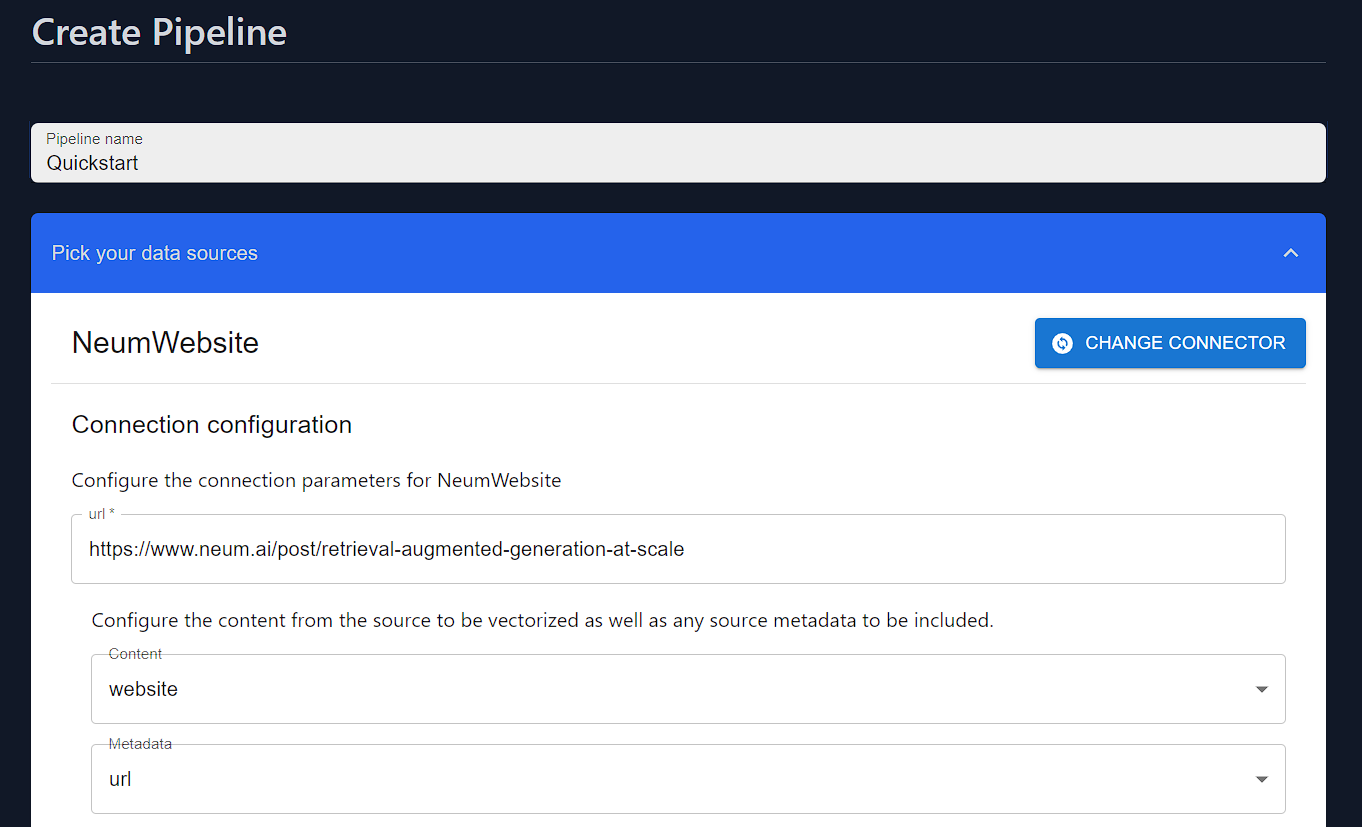
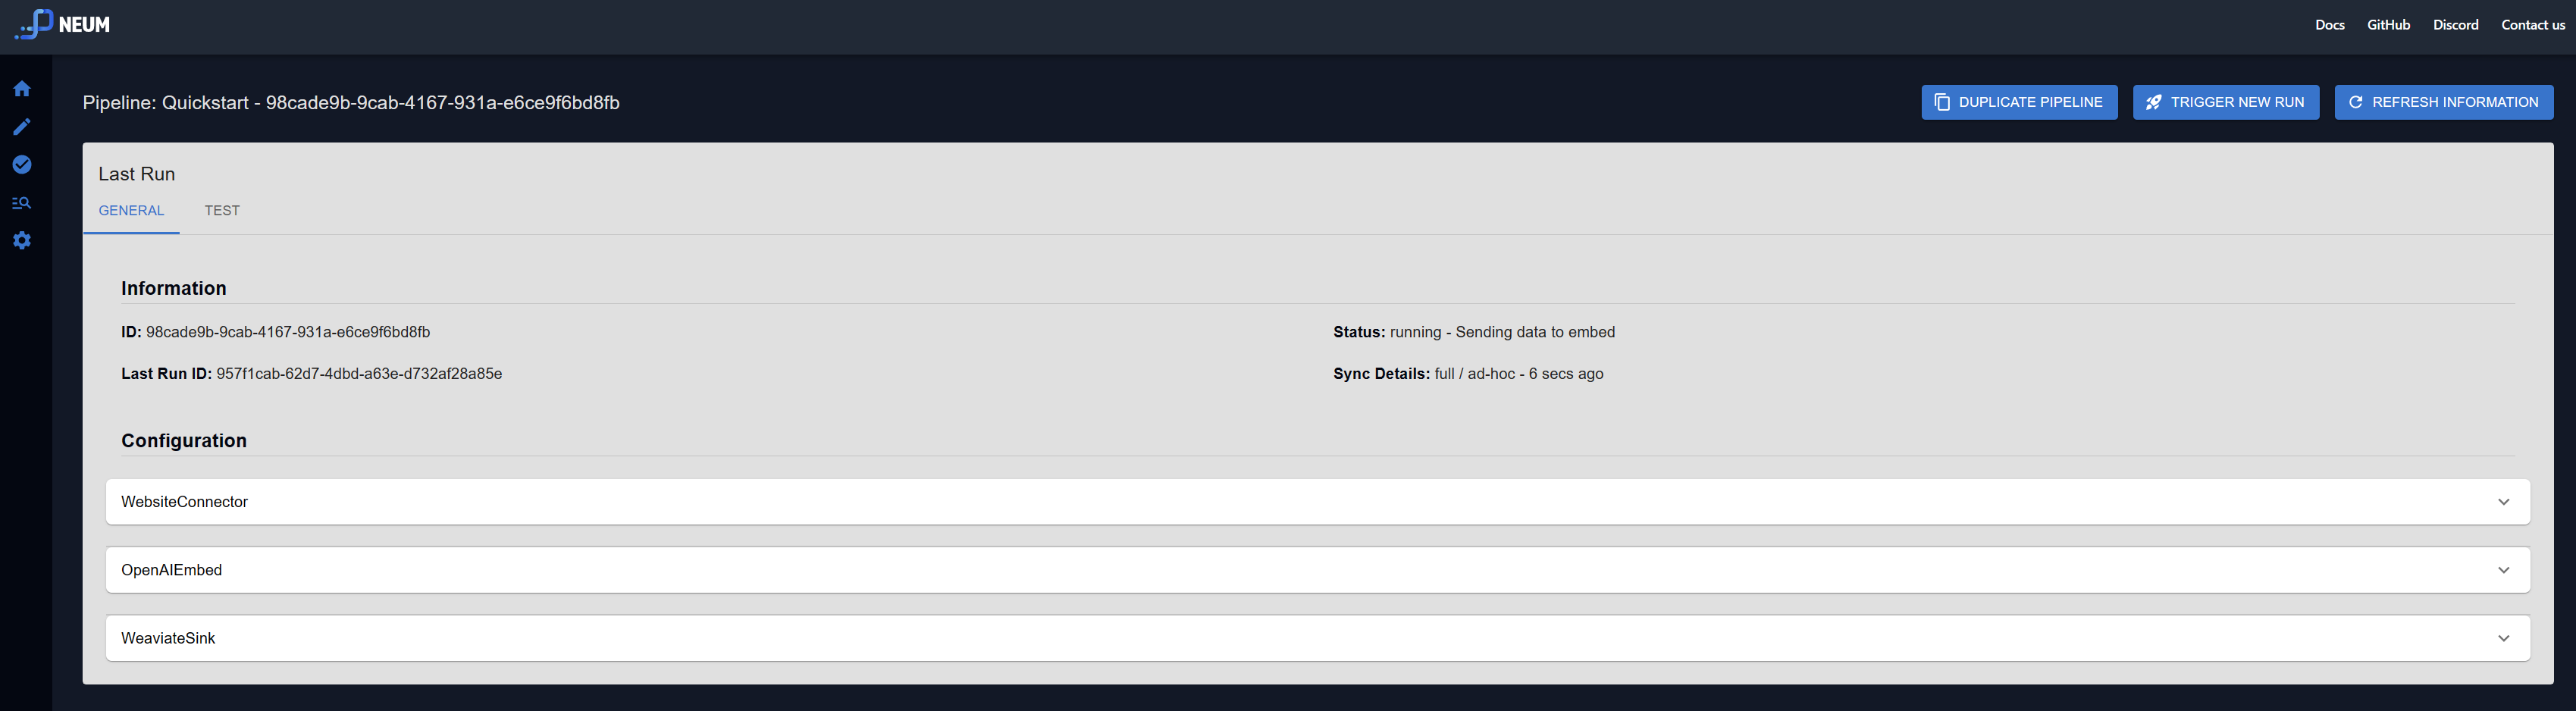
Website source. This source will scrape the web contents of a site and return the HTML in the body.To configure the Data Connector, we will specify the url property. The connector also supports a Selector to define what information from the connector should be used as content to embed and what content should be attached to the vector as metadata.Configure data connector
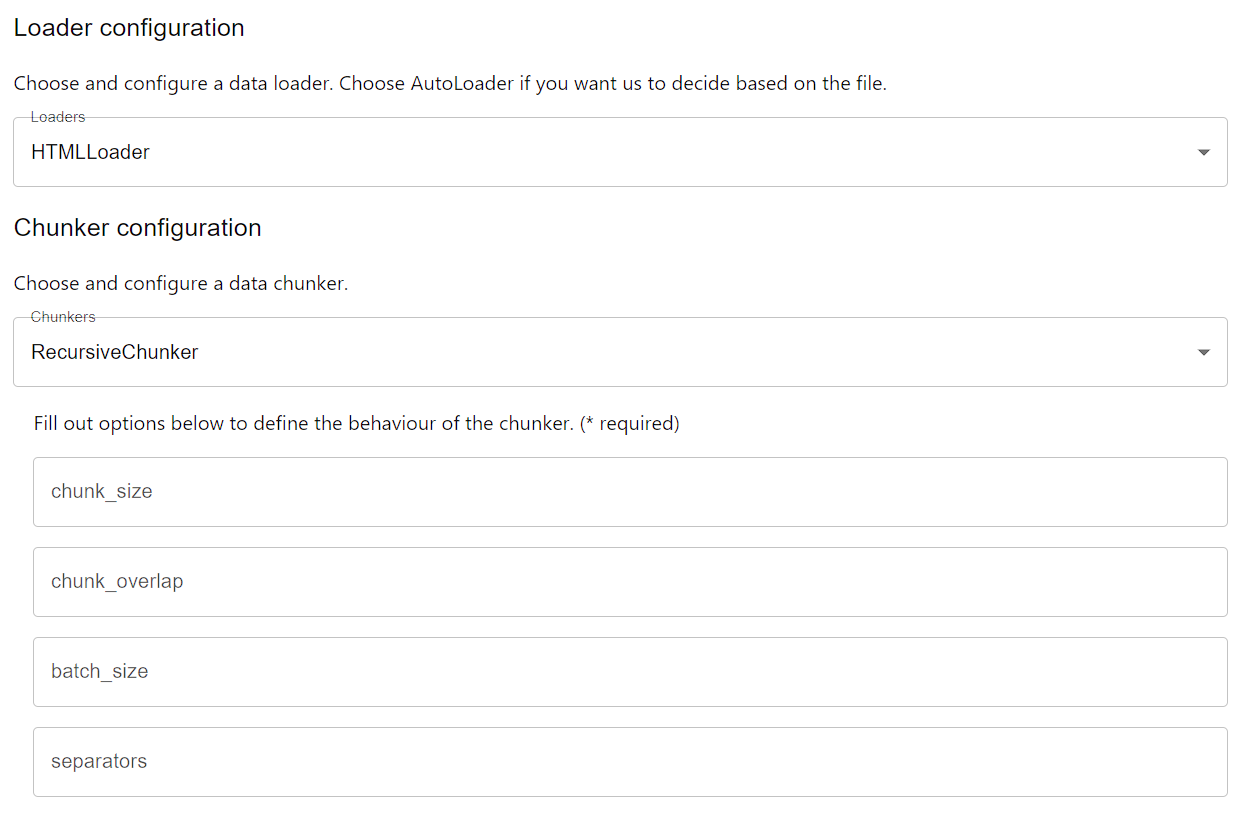
Website source, we will use an HTML Loader as we are extracting HTML code and will use the Recursive Chunker to split up the text. We will configure the Data Connector, Loader and Chunker into a SourceConnector.configure source
Configure embed connector
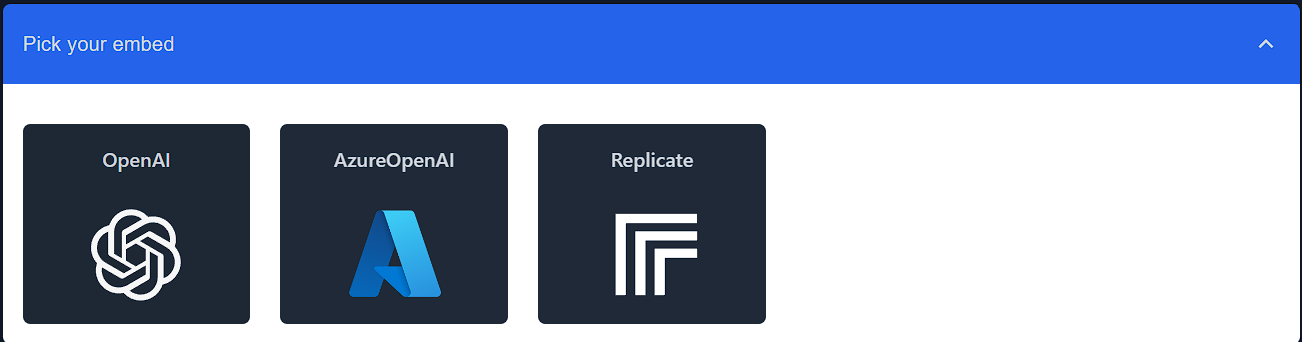
Neum AI supports a variety of embed connectors.
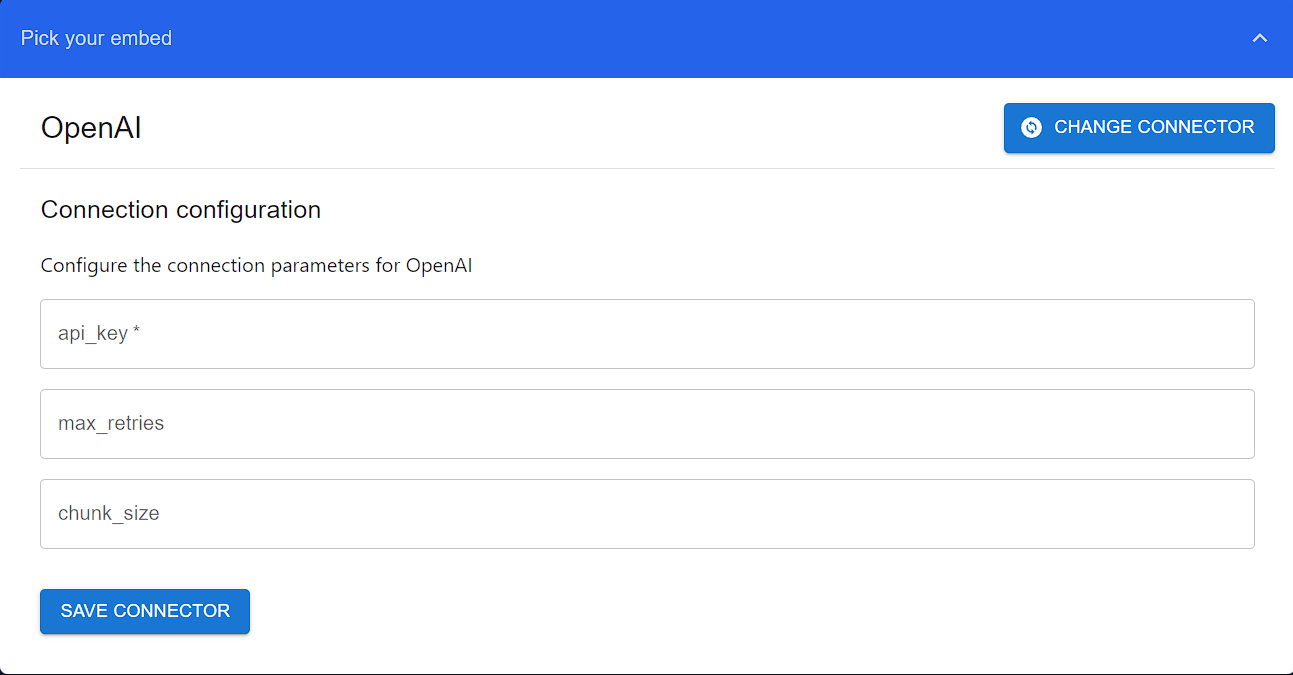
OpenAIEmbed connector. This connector uses text-ada-002, one of the most popular embedding model in the market to generate vector embeddings.Configure the connector with an OpenAI Key.To get an API Key visit OpenAI. Make sure you have configured billing for the account.
Configure embed
Configure sink connector
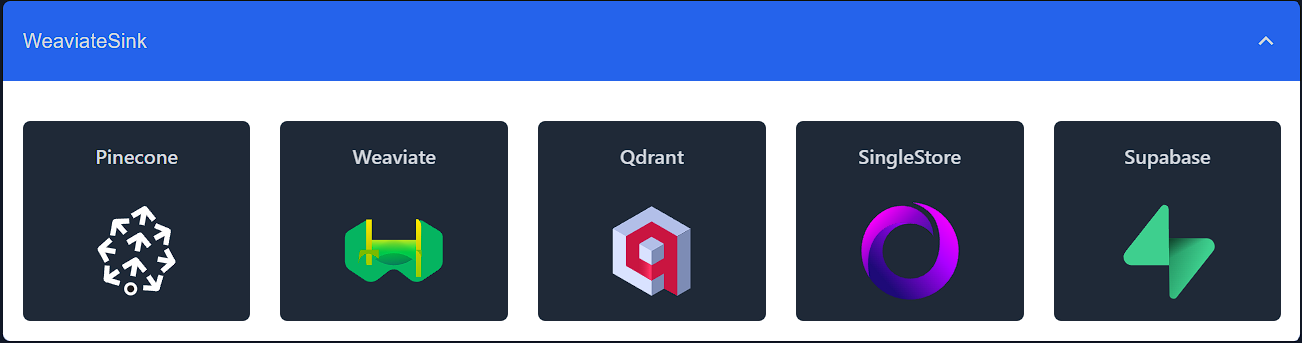
Neum AI supports a variety of sink connectors.
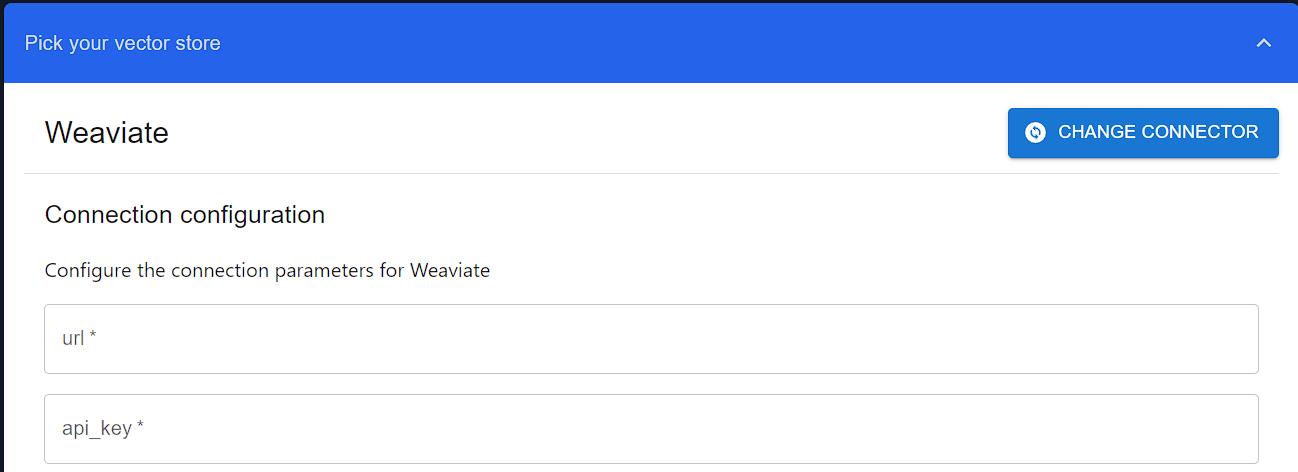
WeaviateSink connector. Weaviate is a popular open-source vector database.Configure the Weaviate connector with the connection parameters including: url and api_key. Other parameters are available to further configure the connector. For example, we will use class_name to define a name for the index we are creating.To get a URL and API Key visit Weaviate Cloud Service.
Configure sink
Run the pipeline
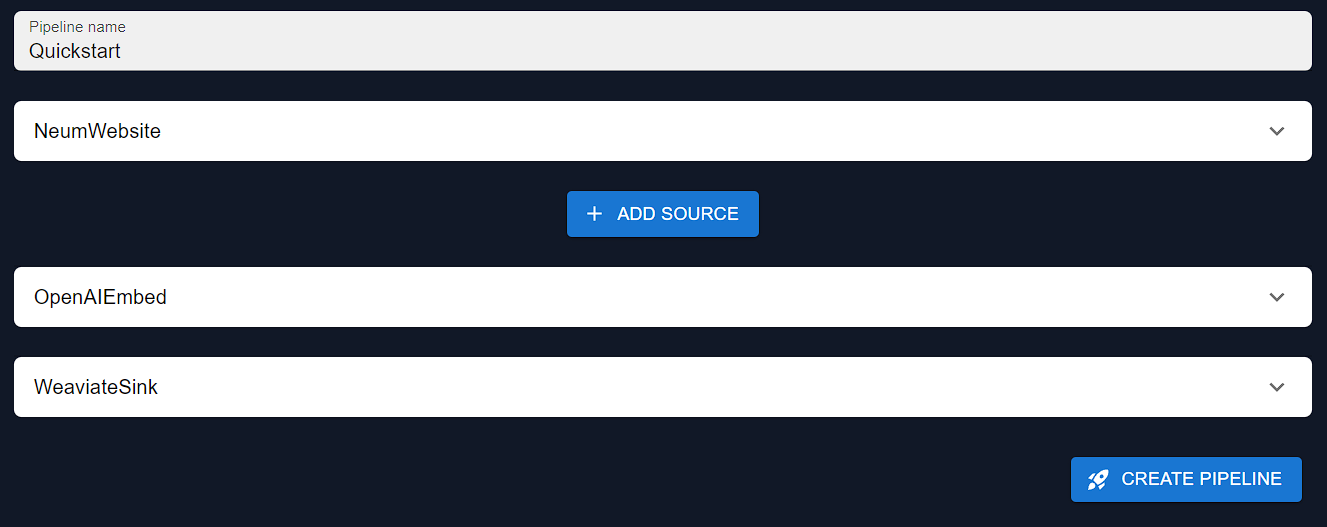
To run the pipeline all together, we will first configure aPipeline object and then use the built-in methods to run it.Configure pipeline
The method
run is not intended for production scenarios. Take a look at our cloud offering where we handle large-scale parallelization, logging and monitoring for you!Run pipeline
After running the pipeline, we can now re-use the pipeline configuration to query data that was extracted or do future runs of the same pipeline. You will need to store the pipeline configuration. By using the same configuration, you will make sure that retrievals are done following the same configuration for how the data was stored in the first place. This includes using the same embedding model and the storage configuration.
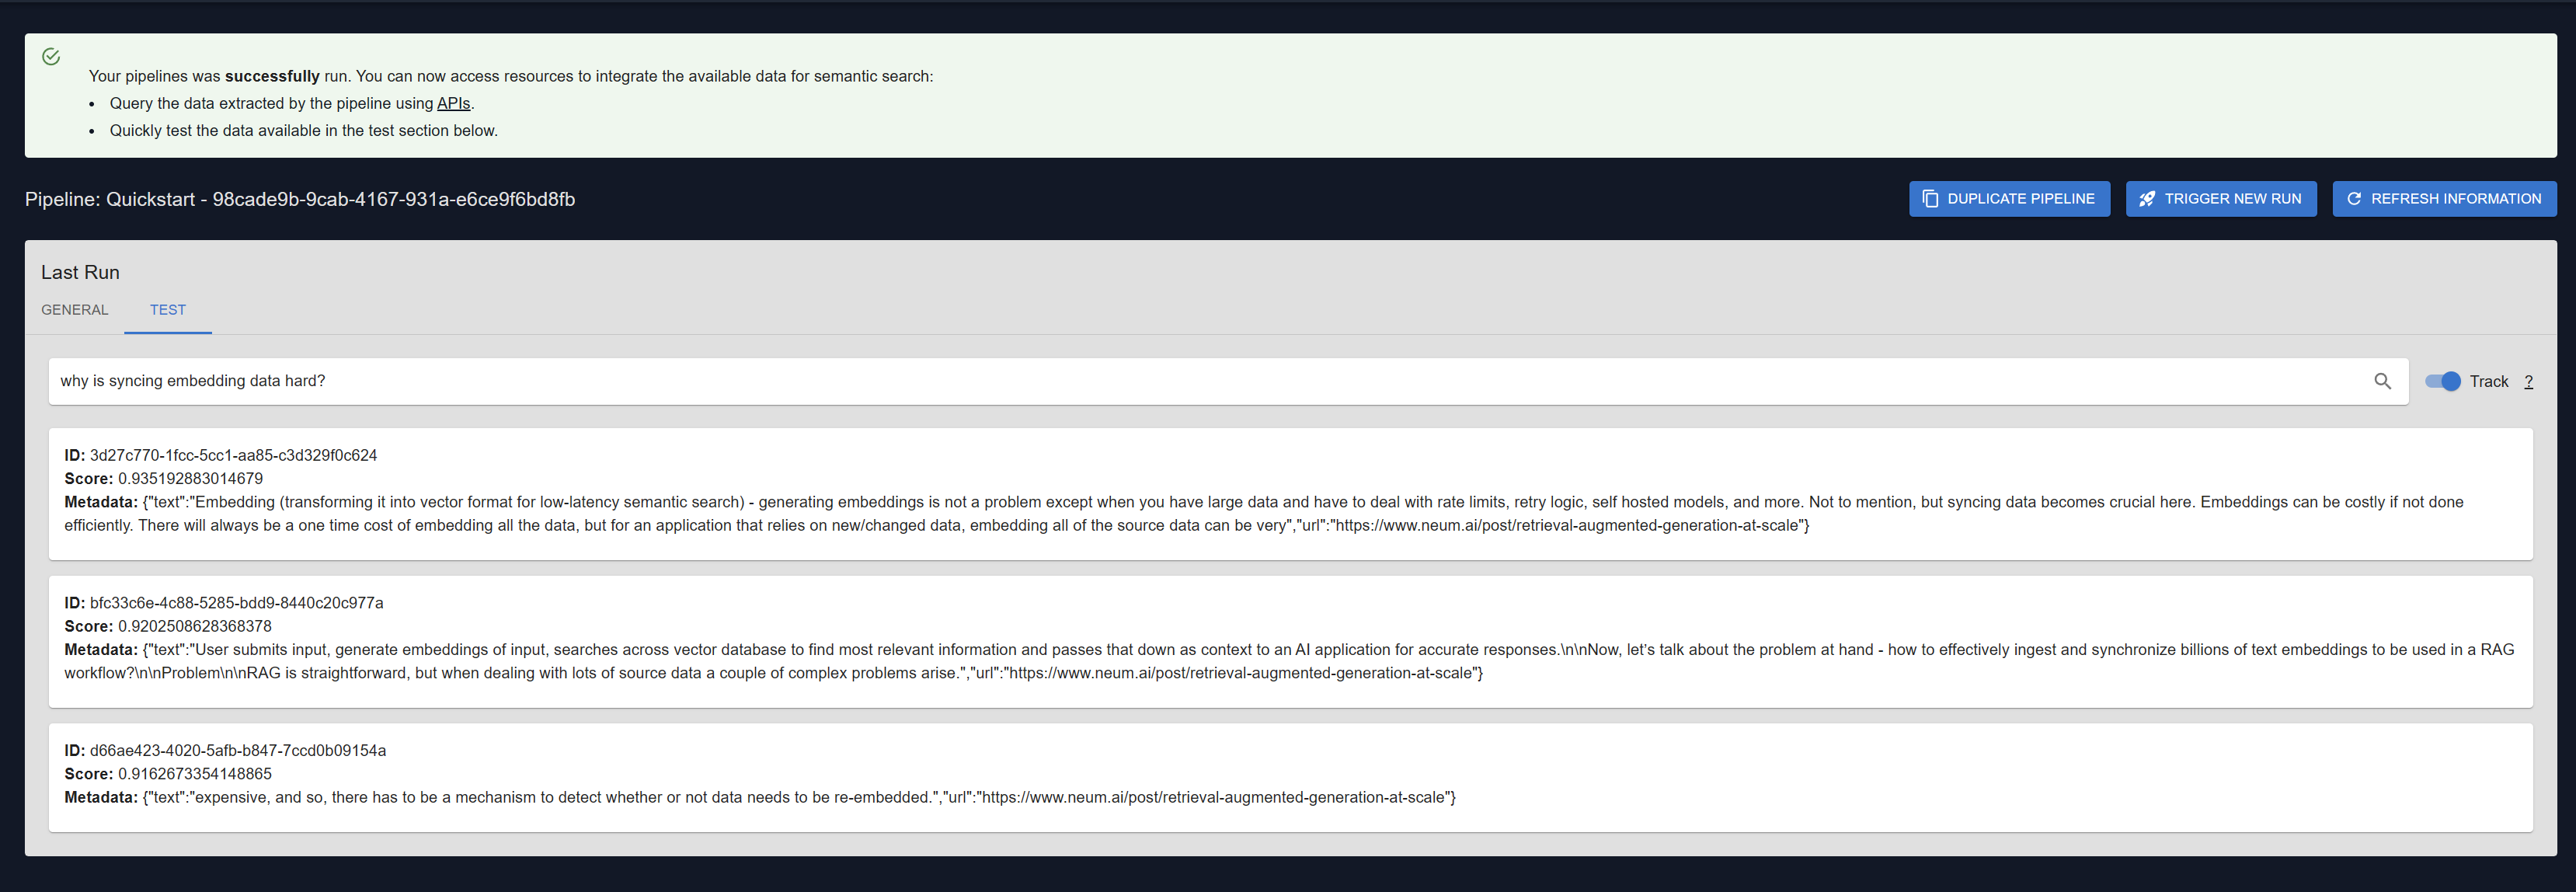
Search the pipeline
Finally, once it is done running, we can now query the information we just moved into vector storage.Search pipeline
Deploy the pipeline
Once you have tested the pipeline locally, you can now take the configuration you created and deploy it to the Neum AI Cloud.Deploy pipeline
Deploy your pipeline configuration to Neum AI Cloud to take advantage of the full set of capabilities like scheduling, synchronization and logs.